If you are trying to do some deep learning,
you would want them to run inside a Docker,
because deep learning frameworks are quite tricky and
it is not easy to set the environment at once.
They are sensitive to the run time environment,
so you would likely to install them over and over again,
and the situation could go worse and worse that
you cannot go back to the initial environment.
This is why you would need Docker, since they can be isolated
from outside of the container,
and even if something goes wrong,
you can just remove the container and install again.
Moreover, installation does not take too long!
Docker is not a virtual machine and but is similar to a virtual machine.
But unlike other virtual machines, Docker shares OS with the host and
that is the main advantage of Docker being lightweight.
Running Horovod inside a container is an easy one.
You can just download pre-defined Docker images built
(e.g. https://ngc.nvidia.com/catalog/containers/nvidia:tensorflow),
and run Horovod with argument you like.
However, it is not easy to run Horovod across multiple machines or nodes, especially if you run it
inside Docker container and there are little information on the internet.
Since I was one who had trouble like above, and even if I still do not understand
what was the root causes of the problem, I take a note and leave it here for someone or for myself.
I could finally run Horovod across multiple machines with helps from other people.
1. Run (Install) Docker Image
First you need Docker and a proper Docker image. Get one if you do not have yet, such as the link above.
Note that You may need to download latest image. I had trouble with image from march 2020
(but not sure whether it was the cause of the problem), and resolved with one from september 2020.
I had a problem where Horovod could not find common interface even if there was.
I ran Docker containers with the following command:
docker run --gpus all -it --cap-add sys_admin \
    --cap-add sys_ptrace --security-opt seccomp=unconfined \
    --shm-size=50g --ulimit memlock=-1 --ipc=host -v /data:/data \
    --network host --name docker_name --hostname docker_name \
    nvcr.io/nvidia/tensorflow:20.10-tf1-py3;
The point is --network host. It means the container can use the host machine's network stack,
and the network interfaces are visible to the container.
Briefly, the same network is shared between the host and the container.
This will make ssh communication settings much simpler.
I had a few experiments and it seems that you can make ssh connections between containers with -p argument to proxy between host's port and docker's port,
but an error would occur while running Horovod.
It seems not technically explainable, but Horovod does not work with -p.
Use --network host instead.
2. ssh Settings
Essentially Horovod is implemented with ssh connection and
it is important to clarify that there is no problem in ssh connection or user input prompt on ssh connection.
You need to generate ssh keys and copy public keys from one to the others
so that user input is not needed while communicating on ssh.
Briefly, generate ssh keys by ssh-keygen -t rsa and copy the resulted /(id)/.ssh/id_rsa.pub into the other machines
with the name /(id)/.ssh/authorized_keys.
Note that you might want to concatenate the files rather then copy the files because it could delete the
contents.
Now all the containers share their public keys. Now we need to enable ssh server service.
It would not be needed to enable ssh server service and the following instructions on all machines, but I recommend to be sure.
Install openssh-server and enable it by service ssh start.
It is good to make the container automatically restart ssh server service every boot-up.
Now the containers are ready to serve as a ssh server. However, there is one more step to do because of Docker containers.
Default ssh port is 22, and the same thing applies to the host machine.
It make things tough if every ssh connections are fed into the host's port 22.
We would best to open another port(i.g. 12345) of the host, and use it as a container's ssh server port.
Since the host and the container share the network interface, the port is visible inside the container.
One simple way to open port is to use ufw (such as sudo ufw allow 12345), or you can use iptables.
And then, you need to modify the default ssh server port on the container.
Get inside the container and let us modify the ssh server configuration file /etc/ssh/sshd_config.
You may see the line #Port 22. Uncomment the line by deleting # at the beginning and edit the port number.
There is one more thing. You might be stuck after executing the command, seeing no output or error.
This is the result of not adding fingerprint of each machine. Try to ssh every other machine even if you have added
the public key into them.
3. Run Horovod
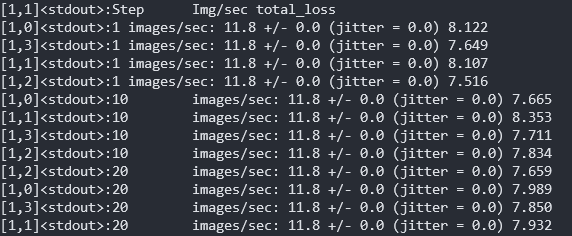
All docker containers, ssh server settings, port settings are done, and they are ready to run Horovod.
One example of Horovodrun is:
# 2 GPUs in local, 2 GPUs in remote
horovodrun -np 4 -H localhost:2,123.123.123.123:2 -p 12345 \
    python scripts/tf_cnn_benchmarks/tf_cnn_benchmarks.py \
    --model resnet50 \
    --batch_size 16 \
    --variable_update horovod \
    --use_fp16;
The command will spawn two processes on the local machine, and different two processes on the machine with ip address 123.123.123.123.
Of course the ip address is that of the remote host machine.
Note that the port number is specified as -p 12345.
There is no way for Horovod to find out on its own which port to use for ssh communication, so you need to tell it.


Looks like that was it. I will add more contents if I find something helpful.